Introduction to Homemade Nut Butters
Why Choose Additive-Free Nut Butters?
Imagine reaching for a jar of nut butter, only to find a long list of preservatives, added sugars, and hydrogenated oils on the label. For many, this is the reality of store-bought options. Making your own nut butter at home eliminates these unwanted ingredients, giving you control over what goes into your food. Choosing additive-free nut butters is not just a health decision but also a lifestyle choice that aligns with clean eating and mindful consumption. When you prepare nut butters yourself, you can enjoy the pure, rich taste of nuts in their simplest form, free from any artificial interference.
Health Benefits of Homemade Nut Butters
Homemade nut butters retain all the natural nutrients found in nuts, such as healthy fats, protein, vitamins, and minerals. Unlike commercial versions, homemade varieties don’t contain excess salt, sugar, or preservatives that can undermine their health benefits. For example, a friend of mine suffering from high blood pressure switched to homemade almond butter to avoid the added salt in store-bought options, and the difference in her energy and overall health was remarkable. Furthermore, the creamy texture and freshness can enhance your enjoyment, making it easier to incorporate nutrient-dense foods into your daily diet.
Essential Ingredients and Tools
Selecting the Right Nuts
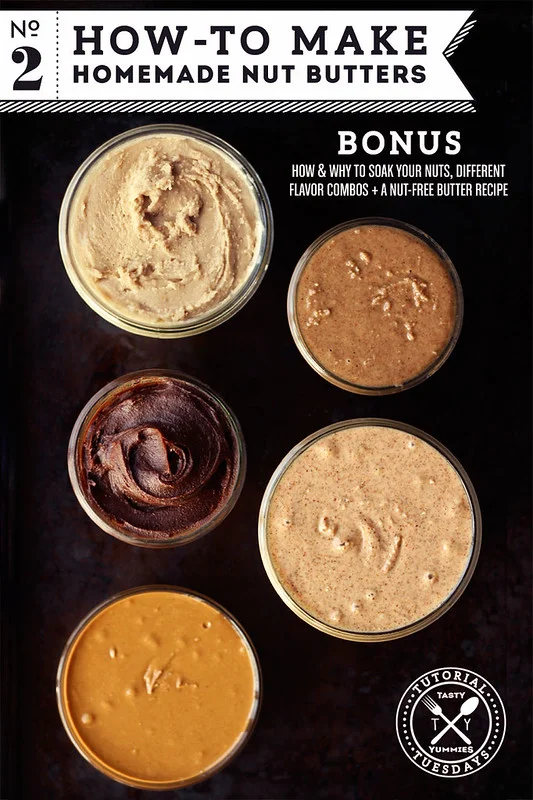
Choosing high-quality nuts is the foundation of great homemade nut butter. Raw or dry-roasted nuts can both work, but the choice alters the flavor profile and texture. For instance, cashews produce a naturally creamy butter, while almonds create a slightly grainy but rich spread. If you prefer a bold taste, try using roasted peanuts or hazelnuts. Always opt for fresh nuts without any added salts or coatings to ensure the purest flavor. Walking through a local farmers market and selecting freshly harvested nuts can make a noticeable difference.
Recommended Kitchen Equipment
The right tools make the difference between a smooth, silky butter and a frustratingly chunky paste. A high-powered food processor is often the best option, as it can sustain long grinding periods without overheating. Some enthusiasts recommend starting with a powerful blender, but many find that the food processor’s wider bowl helps achieve a more even consistency. In addition, a sturdy spatula is essential for scraping the sides during the grinding process. If you’re looking to experiment, a mortar and pestle can work for small batches, although it requires more manual effort and time.
Preparation Steps for Creamy Nut Butters
Roasting Nuts: Techniques and Tips
Roasting nuts is a key step that enhances flavor and aids in achieving a creamy texture. Spread your chosen nuts evenly on a baking sheet and roast them at 350°F (175°C) for 10 to 15 minutes, depending on the nut variety. Keep an eye on them to prevent burning, as even a few extra minutes can result in a bitter taste. Some people like to toss in a pinch of sea salt before roasting for a subtle savory twist. In one memorable kitchen session, accidentally over-roasting peanuts led to a smoky flavor that surprisingly complemented a spicy homemade sauce I was preparing.
Grinding Nuts: Achieving the Perfect Texture

Once roasted and cooled, transfer the nuts to your food processor. Begin pulsing until the mixture breaks down into crumbs, then continue processing without stopping. Initially, you’ll notice a dry crumbly mixture, but after several minutes, the natural oils release, turning the crumbs into a smooth paste. Patience is vital here—this stage can take between 5 to 10 minutes. If the nut butter seems too thick, adding a tablespoon of neutral oil like walnut or almond oil can help. Remember to pause periodically to scrape down the sides, ensuring every bit is equally processed.
Optional Additions: Enhancing Flavor Naturally
While the pure nut flavor is delightful, you might want to experiment with natural ingredients to boost taste and texture. A drizzle of pure honey or maple syrup can add subtle sweetness without overwhelming the nutty tones. Cinnamon, vanilla extract, or even cocoa powder create a delicious twist perfect for a breakfast treat. These additions keep the nut butter healthy and free from artificial enhancers. One afternoon, I added a pinch of sea salt and a dash of cinnamon to my almond butter, transforming it into an irresistible spread that quickly became a family favorite.
Storage and Shelf Life
Best Containers for Homemade Nut Butters
Proper storage maintains the freshness and prevents spoilage. Glass jars with airtight lids are the best choice for homemade nut butters, as they do not absorb odors and are easy to sterilize before use. Small mason jars work perfectly and are convenient for portion control. Avoid plastic containers, which can retain oils and odors, and always ensure the jars are completely dry before filling them. Labeling jars with the preparation date can help track freshness over time.
How to Prolong Freshness Without Additives
Since homemade nut butters do not contain preservatives, refrigeration is essential to maintain their quality. Store the jar in the fridge to slow down the natural oil separation and prevent rancidity. Before using, allow the nut butter to sit at room temperature for a few minutes to soften slightly. For longer storage, some choose to freeze small portions in silicone molds; this works well for maintaining freshness without altering the texture. A friend once kept his homemade peanut butter refrigerated for over three weeks, finding it fresh and delicious throughout that period.
Troubleshooting Common Issues
Why Is My Nut Butter Grainy?
Graininess usually indicates that the nuts have not been ground sufficiently or the food processor isn’t powerful enough. In some cases, the nuts may be too dry or old, which can prevent the oils from blending smoothly. If you find your nut butter gritty, try processing it longer, scraping down the sides more often, or adding a bit of natural oil to help achieve a creamier consistency. Also, ensure the nuts are fresh and properly roasted, as stale nuts can affect texture and flavor negatively.
Fixing Oil Separation Naturally
Oil separation is a natural occurrence when making nut butters at home. The oils separate and rise to the top because there are no stabilizers present. To fix this, simply stir the nut butter thoroughly before each use. If oil pooling on top bothers you, refrigerate your nut butter jar upside down to help redistribute the oils evenly. Avoid shaking aggressively as it can introduce air pockets, affecting texture. Over time, your nut butter will develop a natural rhythm of oil separation, so embracing this aspect is part of the homemade experience.
Creative Recipes Using Homemade Nut Butters
Nut Butter Smoothies and Breakfast Bowls
Start your day with an energizing smoothie by blending a spoonful of homemade nut butter with bananas, oats, and almond milk. The added protein and fats keep you full until lunchtime. Another delicious idea is to swirl your nut butter into warm oatmeal or yogurt bowls, topped with fresh fruit and seeds for a nutrient-packed meal. A colleague of mine mixes her walnut butter into chia pudding, creating a decadent but healthy breakfast that fuels her busy mornings.
Nut Butter-Based Sauces and Dressings
Nut butters can transform simple sauces into creamy delights. For instance, combining peanut butter with soy sauce, lime juice, and a touch of honey makes an easy, flavorful dressing perfect for salads or noodle dishes. Cashew butter mixed with garlic, lemon, and olive oil creates a velvety sauce that elevates roasted vegetables or grilled chicken. Experimenting with these sauces in everyday meals adds variety and a satisfying richness that’s hard to find in store-bought dressings.

