Understanding the Basics of Searing Chicken
What Does Searing Achieve?
Searing chicken is a culinary technique where the surface of the chicken is cooked at a high temperature until a brown, flavorful crust forms. This process enhances the taste and texture, creating a satisfying contrast between a crispy exterior and tender interior. Beyond the appealing look and flavor, searing contributes to the development of rich, caramelized notes through the Maillard reaction.
Why Locking in Juices Matters
Many cooks believe searing locks in juices, preserving moisture inside the chicken. While searing itself doesn’t completely seal in juices, it creates a crust that helps reduce moisture loss during further cooking. Proper searing followed by appropriate cooking and resting ensures the chicken remains juicy and flavorful. This is crucial for an enjoyable eating experience since dry chicken can feel tough and unappetizing.
Preparation Before Searing
Selecting the Right Chicken Cut
Choosing the optimal cut sets the stage for successful searing. Thicker cuts like bone-in breasts or thighs retain moisture better and withstand high heat without drying out quickly. Thin cuts can cook too fast, risking overcooking before searing properly. Skin-on chicken adds extra flavor and helps protect the meat underneath during searing.
Essential Tools and Equipment
Having the right tools simplifies the searing process. A heavy-bottomed skillet or cast iron pan distributes heat evenly and maintains high temperatures, which is ideal for searing. Use tongs or a spatula to handle the chicken gently without piercing the meat. Ensuring your stove can deliver consistent heat contributes significantly to the outcome.
Prepping Chicken for Optimal Searing
Before searing, pat the chicken dry thoroughly with paper towels to remove surface moisture. Wet chicken will steam rather than sear, preventing a crispy crust. Season with salt and pepper or your preferred spices just before cooking. Avoid over-seasoning early to prevent drawing out moisture prematurely.
Mastering the Searing Process
Choosing the Ideal Cooking Fat
Use fats with high smoke points like vegetable oil, canola oil, or clarified butter. These fats tolerate high heat without burning, creating the perfect environment for searing. Avoid using butter alone as it burns quickly, though it can be added in the final stage for flavor enhancement.
Heat Levels and Pan Selection
The pan should be preheated over medium-high heat until very hot. A smoking-hot pan ensures immediate searing upon contact, minimizing sticking. Cast iron pans excel in heat retention and provide an even sear. Avoid overcrowding the pan as this lowers the temperature and leads to uneven cooking.
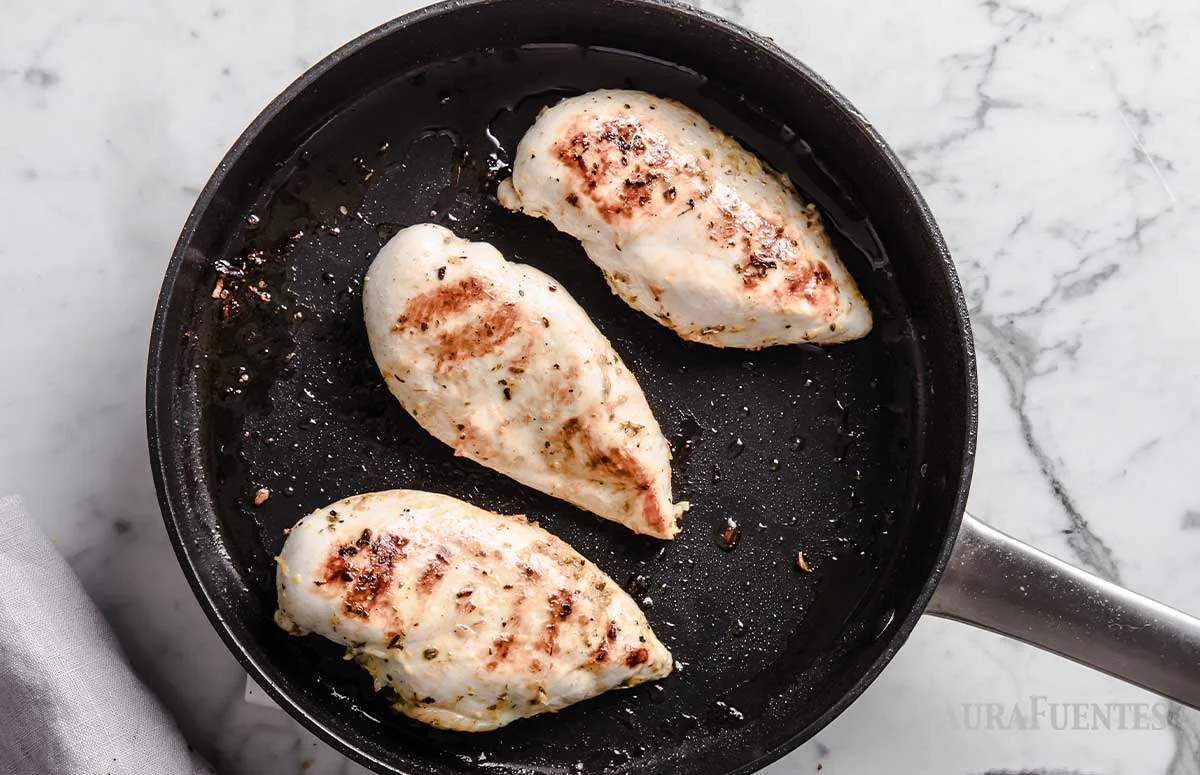
Step-by-Step Searing Instructions
Start by adding the cooking fat to the hot pan. Gently place the chicken skin-side down without crowding. Let it cook undisturbed for several minutes until a golden-brown crust forms. Resist the urge to move or flip the chicken too soon; it will release naturally from the pan when ready. After the initial sear, flip the chicken to brown the other side, then reduce heat and continue cooking until done.
Post-Searing Techniques to Ensure Juiciness
Resting the Chicken Properly
Allow the chicken to rest after searing to redistribute juices evenly. Resting for about 5 to 10 minutes on a warm plate enables the meat fibers to reabsorb liquids, enhancing moisture retention. Cutting too soon causes the juices to escape, resulting in dryness.
Alternative Finishing Methods
After searing, finishing the chicken in the oven is a popular method to ensure thorough cooking without over-browning. This gentle heat allows the juices to stay trapped inside. Alternatively, braising or adding a sauce post-sear can introduce moisture and deepen flavor.
Troubleshooting Common Issues
Why Chicken Sticks to the Pan
Chicken sticks when the pan is not sufficiently hot or when moisture remains on the surface. Always preheat the pan and dry the chicken before cooking. Using enough oil creates a barrier between the pan and meat. Avoid moving the chicken prematurely; it will release naturally once the crust forms.
Avoiding Overcooking and Dryness
Overcooking is often the main cause of dry chicken. To prevent this, monitor temperature closely and adjust heat as needed. Use a meat thermometer to check for an internal temperature of 165°F (75°C). Removing chicken promptly after doneness, followed by resting, preserves juiciness effectively.

